To keep your computer safe and clean of viruses that's one thing which is very important for your computer. But you don't want to get bothered with annoying warnings from Windows Vista each time you install a program or when you make a change in Vista's settings?
Without any doubt is Vista's most irritating tool the User Account Control (UAC). The User Account Control takes care that Windows asks permission to several system sources over and over again.
I have to admit that this standard setting helps you to keep your computer clean, but do you really want to give permission for every small setting change, like changing the Windows' standard font?
I think your answer is NO!

Showing posts with label Windows Vista. Show all posts
Showing posts with label Windows Vista. Show all posts
Thursday, July 2, 2009
Monday, March 23, 2009
Configure Windows Mail to connect to Gmail
![]() Continuing our “How to” series on configuring Windows Mail for different e-mail providers, today we are going to show you, step by step, how to configure Windows Mail to connect to your Gmail account. As you might now, Gmail offers free POP3 support for all accounts. However, in order to use it, you might need to activate it from the Gmail web interface.
Continuing our “How to” series on configuring Windows Mail for different e-mail providers, today we are going to show you, step by step, how to configure Windows Mail to connect to your Gmail account. As you might now, Gmail offers free POP3 support for all accounts. However, in order to use it, you might need to activate it from the Gmail web interface.
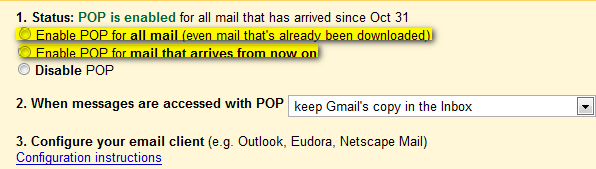
How to activate POP3 in Gmail
Before starting, please check if POP3 is activated for your Gmail account. To check, login to your account and go to Settings -> Forwarding and POP/IMAP.

Now activate your POP3 service by selecting one of these two options: Enable POP for all mail, or Enable POP for mail that arrives from now on.
How to configure Windows Mail
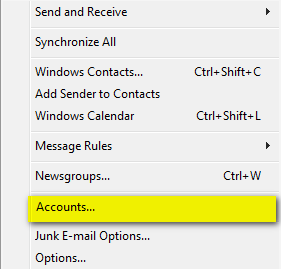
First, start Windows Mail. Go to the Tools menu and then click on the Accounts button as shown in the picture below.
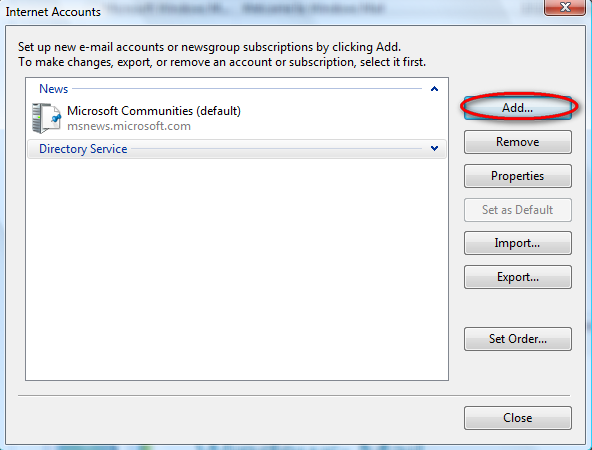
Then, click on the Add button.
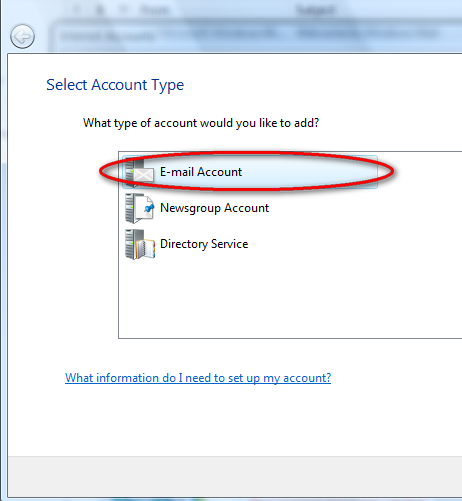
Select the E-mail Account option and click on Next.
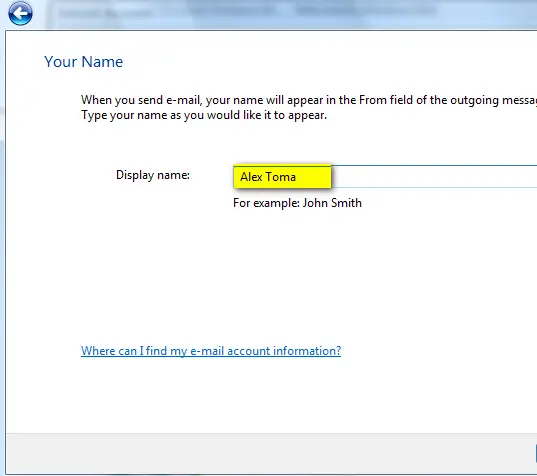
Next you can choose the display name that will be shown in every outgoing e-mail message. Type it and go to the next window.
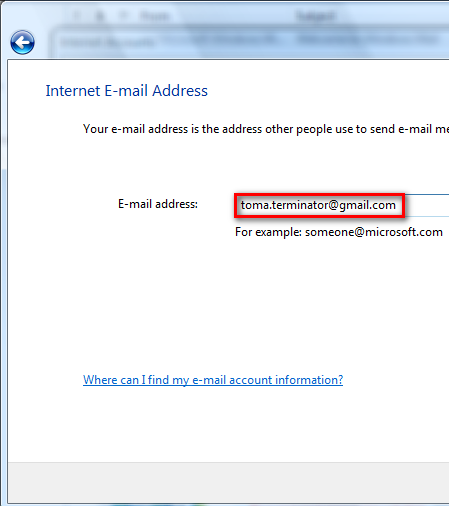
Now, you will be asked for your e-mail address. Type it and click on Next.
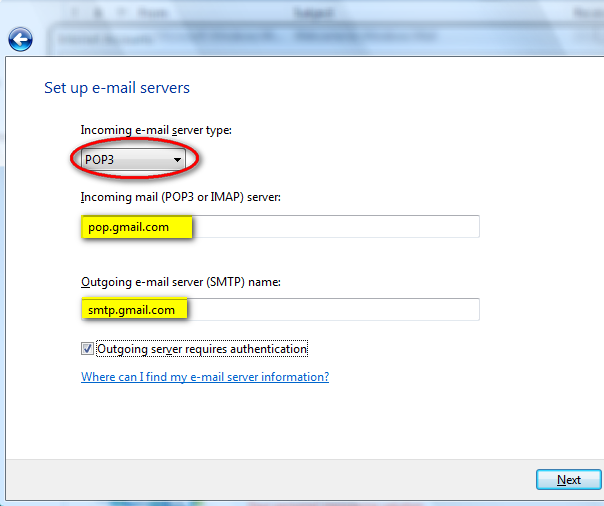
In the next window you have to setup the e-mail servers. From the Incoming e-mail server drop-down list, select POP3. Then, enter the Incoming & Outgoing server names as shown in the picture below and check the Outgoing server requires authentication option. When you are done, click on Next.
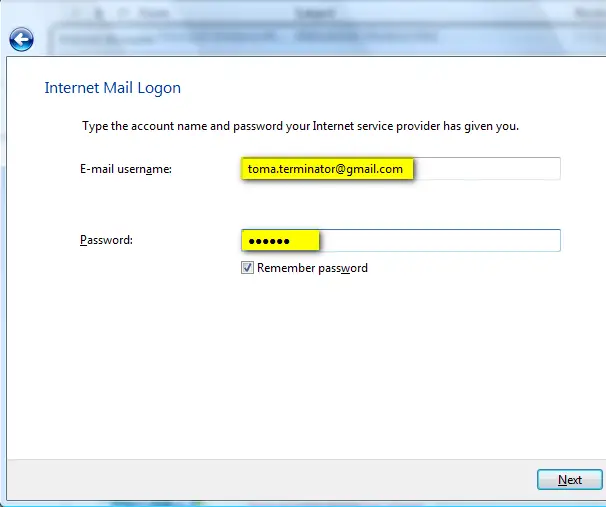
In the Internet Mail Logon window you have to enter your e-mail address and password. Also, for your ease-of-use, check the Remember password option and then click on Next.
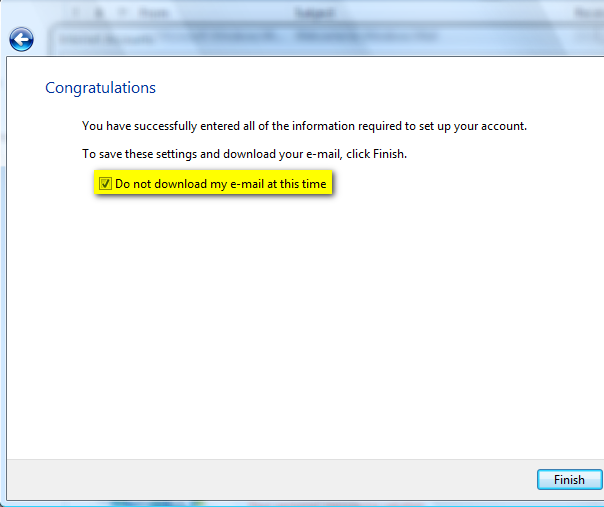
You are now almost done. Check the Do not download my e-mail at this time option as you will have to make some other minor adjustments. Then, click on the Finish button.
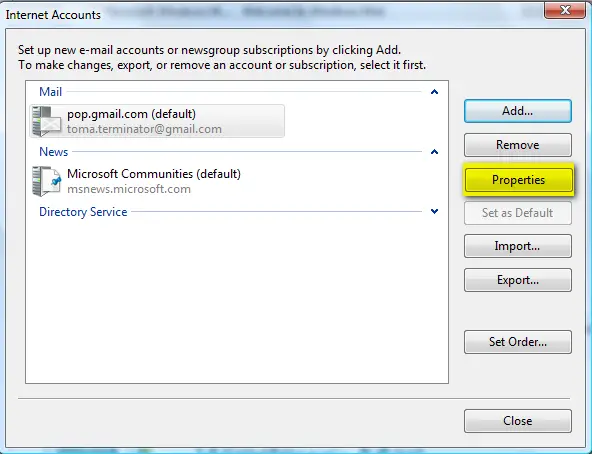
The Internet Accounts window should be opened. Select your Gmail account and click on Properties.
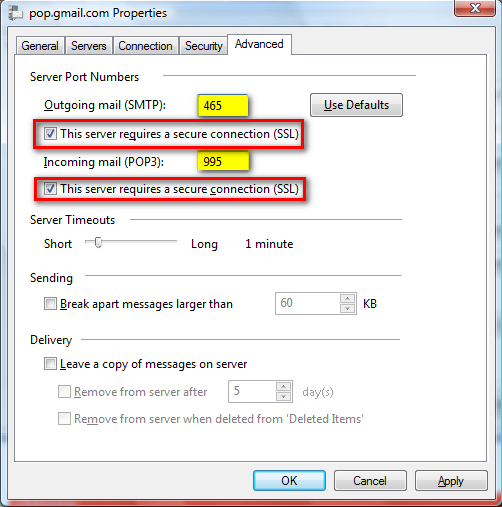
Go to the Advanced tab and type 465 as the port for the SMTP server and 995 for the POP3 server. Also, please note that you have to check the option that says “This server requires a secure connection (SSL)” for both POP3 and SMTP.
If you want your messages to be left on the Gmail servers as backup, then don’t forget to check the option that says Leave a copy of messages on server. If you do not check it, when a message is downloaded it is automatically removed from the Gmail servers. When finished, click on OK.
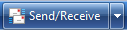
Windows Mail is now configured to access your Gmail account and download your messages. Press the Send/Receive button and the download will start.
Subscribe to:
Posts (Atom)